To see a video demonstration of task #1, creating views, see: https://youtu.be/5uAwfJBCo7s
To see a video demonstration of task #2, updating views, see: https://youtu.be/r6_T85H0kxo
To see a video demonstration of task #3, deleting or modifying the view structure, see: https://youtu.be/giJX6aE3oCo
To see a video demonstration of task #4, system catalog commands, see: https://youtu.be/sXFlsrsZekc
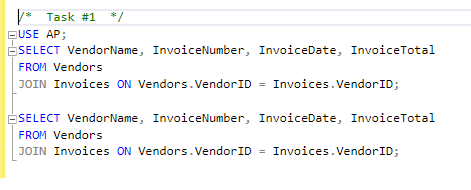
1. Launch SSMS, create a New Query and enter /* Task #1 */ in comments at the top of the window
2. It is helpful to do the select statements separately, before creating the view - at this point, the two select statements are identical (we will be modifying them to create the two views):
3 We are going to adjust the two select statements we just entered to create two views, one that is updatable and one that is not. When coding a view, you need to use the word GO between commands or you cannot run them at the same time. Text you need to insert is boldfaced and highlighted
USE AP;
GO
--Updateable View:
CREATE VIEW VI_view
AS
SELECT VendorName, InvoiceNumber, InvoiceDate, InvoiceTotal
FROM
Vendors
JOIN Invoices ON Vendors.VendorID = Invoices.VendorID;
GO
--Limited Update View:
CREATE VIEW VI_limited_view
AS
SELECT VendorName, InvoiceNumber, InvoiceDate, InvoiceTotal
FROM
Vendors
JOIN Invoices ON Vendors.VendorID = Invoices.VendorID
WITH CHECK OPTION;
GO
4. After executing the code, comment it out.
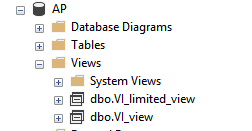
5. You will notice that the views don't display the selects. To verify the views have been created, look in the SSMS Object Explorer panel and expand the View folder which is located below the Table folder
6 To see how the view will look to the user, we need to create a select statement and use the named view in place of the table name. Enter the select statement shown below:
SELECT * FROM VI_limited_view;
SELECT * FROM VI_view;
You should notice the result sets look identical. The difference is that VI_view can be updated and VI_limited_view can only update what you can see.
Comment out the selects and save your changes as chapter13-textbook-assignment.sql.
1. Enter the command below to create the view (You should note that Balance is a calculated column. calculated columns require names and force the view to be read-only):
CREATE VIEW OutstandingInvoices (Invoice#, Date, Total,
Balance)
AS
SELECT InvoiceNumber, InvoiceDate,
InvoiceTotal,InvoiceTotal - PaymentTotal - CreditTotal
FROM Invoices
WHERE InvoiceTotal - PaymentTotal - CreditTotal >
0;
2. Comment out the code after running it.
3. Use the following select to verify the data is in the view:
Select * FROM OutstandingInvoices;
4. Comment out the code and save all your changes.
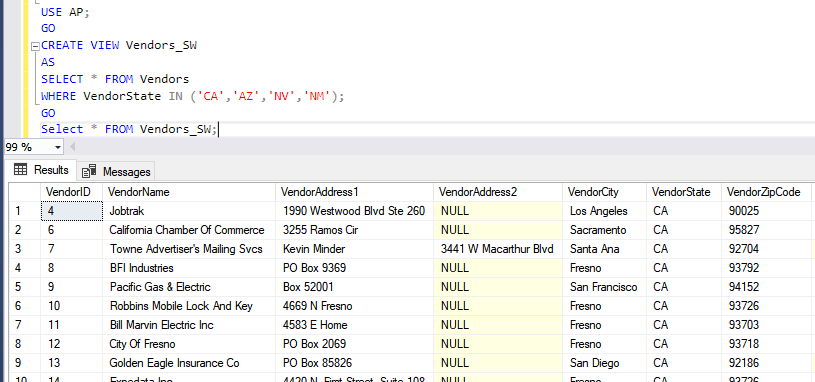
1. Create the view shown below and run a select displaying the view (note - the output example is only showing a portion of the output):
2. Comment out the code and save your changes.
1. Enter Task #2 and comment it out.
2. Enter the update command shown below:
UPDATE VI_view
SET InvoiceDate=GETDate()
WHERE
VendorName='IBM';
3. After executing the view, comment out the code.
1. Enter the VendorPayment view shown below and run the select to display the data
USE AP;
GO
CREATE VIEW VendorPayment
AS
SELECT VendorName, InvoiceNumber, InvoiceDate, PaymentDate, InvoiceTotal, CreditTotal, PaymentTotal
FROM Invoices
JOIN Vendors ON Invoices.VendorID = Vendors.VendorID
WHERE InvoiceTotal - PaymentTotal - CreditTotal > 0;
GO
Select * FROM VendorPayment;
2. Comment out the statements and save your changes
3. Our boss noticed a little problem in the PaymentDate column – it requires an update so we can have an actual date display. For all invoices, we can use the current date except for Malloy Lithographing Inc, Invoice # 0-2436. We need to use a payment date of 2020-06-01 and the payment total should be set to 19351.18
To accomplish this, we will do 2 separate updates. Updating
views is similar to updating tables.
USE
AP;
GO
UPDATE VendorPayment
SET PaymentDate=GETDATE();
GO
UPDATE VendorPayment
SET PaymentTotal = 19351.18, PaymentDate =
'2020-06-01'
WHERE VendorName = 'Malloy Lithographing Inc' AND
InvoiceNumber = '0-2436';
4. Verify the changes by running the select statement again:
SELECT * FROM VendorPayment;
5. Comment out the code and save your changes
1. Enter the following insert into statement to add Kookies Kandies to the Vendor_SW view.

2. Comment out the code after running the query.
1. We will do a select first to show the row and then we will delete the row from the view:
Enter the following code:
SELECT * FROM Vendors_SW
WHERE VendorName='Internal Revenue Service';
GO
DELETE FROM
Vendors_SW
WHERE VendorName='Internal Revenue Service';
GO
2. Comment out the code and save your changes.
1. The only way to include additional vendors is to redo the select statement used to create the view. Copy and past the statement that created the view and then adjust the code to add two new states (modifications are highlighted and boldfaced)
USE AP;
GO
ALTER VIEW
Vendors_SW
AS
SELECT * FROM Vendors
WHERE VendorState IN
('CA','AZ','NV','NM','UT','CO');
2. Comment out the code
1. Removing views is similar to removing tables - we need to use the DROP command
USE AP;
GO
DROP VIEW OutstandingInvoices;
2. Comment out the code and save your changes.
1. Enter the heading Task #4 and comment it out.
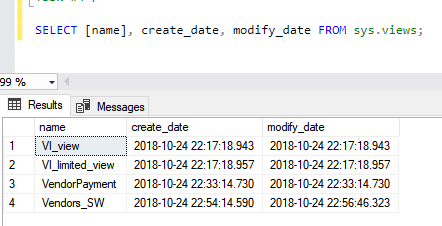
2. Views are contained in a system catalog table named sys.views. Runing a select on sys.views will display the names and a lot of additional information
3. Enter the select shown below to display the view name, create_date and modify_date
4. Comment out the select
5. The boss likes the view listing and would also like listings for all keys Run the query shown below to display the name, create_date, modify_date and type_desc for every key in the AP database
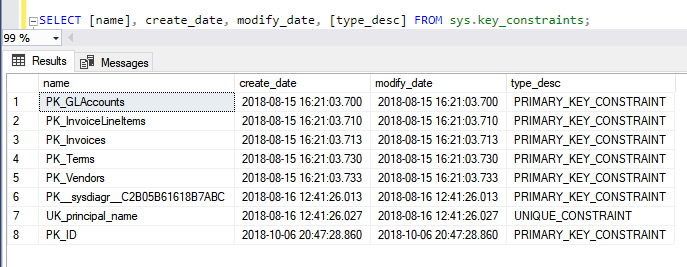
6. Save your changes
7. Close the file and upload it to the dropbox in Moodle.