I. Lesson objectives
By the end of this lesson, you will be able to:
-
Prepare optimized photos and graphic thumbnails.
-
Create jpg and png files
-
Create internal links and external links.
-
Use relative links and absolute links
-
Create links to images
Information on how to accomplish tasks is in the lecture notes and textbook chapters assigned for the current week.
WARNING ON DOWNLOADING FILES: Make sure you right click the links and you do NOT display the page and save the page to your system. If you do that, you will end up with images in folders that we don't want to use! Also make sure you use Chrome or Firefox to download (sometimes Microsoft Edge and the Internet Explorer will create additional folders for graphics that we DO NOT want) Having additional folders to deal with will make linking pages and displaying images a nightmare because what you will have on your system will not match the instructions!!!!
Task #1 - Create folders
1. Navigate to the CIT180 folder on your computer system or jump drive
2. Open the CIT180 folder
3. Create a media folder (you will use this in the supplemental assignment)
4. Create a Lesson3 folder
5. Open the Lesson3 folder and create a media folder
Task #2 - Modify images using LunaPics
To see a video demonstration, watch:
Download the following files to your Lesson3/media folder:


Web Optimization
To see a video demonstration, watch: https://youtu.be/B2Iw2uCqcnE
1. Go to https://www194.lunapic.com/editor/
2. Upload the archRock.jpg image (Click the Upload command button, navigate to the Lesson3/media folder, select the graphic and click Open to upload)
3. Use the File menu, Image Size Info command. Take a look at the dimensions, file size and jpg quality. If the quality is less than 100%, click Change Quality. In the quality textbox, enter 100 and then click Apply. NOTE: If you have a png image, you cannot change the quality (and that is OK)
4. Use the File menu, Image Size Info command. Click the Set File Size link. Enter 50KB for the size and click Resize File. (You will see the current dimensions (in pixels) and the current filesize in Kilobytes. You should notice the width was adjusted and the file size probably isn't 50KB. LunaPics is trying to give you the physical size by reducing the dimensions. If the file is large, it won't be able to get to 50KB without adjusting quality.)
5. If your width dimension isn't 400 pixels, either click Resize dimensions or use the Edit menu, Scale Image command. Enter 400 for the width and click Apply Scale or Scale Image (the height should remain in proportion).
6. To see the current size, use the File menu, Image Size Info command. If the size is larger than 50KB, click on Change JPG Quality and decrease the quality to 94% , click Apply. You should see a new size displayed right above the image and the new size should be approximately 51KB
7. Use the File menu, Save Image command.
8. Click Save as JPG. Change the filename to archRockOptimized and save the file into the Lesson3/media folder
Cropping:
To see a video demonstration, watch: https://youtu.be/XHypDUr15eM
1. Go to https://www194.lunapic.com/editor/
2. Upload the view_from_fort.jpg image (Click the Upload command button, navigate to the Lesson3/media folder, select the graphic and click Open to upload)
3. Use the File menu, Image Size Info command. Take a look at the dimensions, file size and jpg quality. If the quality is less than 100%, click Change Quality. In the quality textbox, enter 100 and then click Apply. NOTE: If you have a png image, you cannot change the quality (and that is OK)
4. Use the Edit menu, Simple Crop Tool command and select the circle shape. Move the shape to the right-hand side of the image as shown below, then click the Crop Image button.
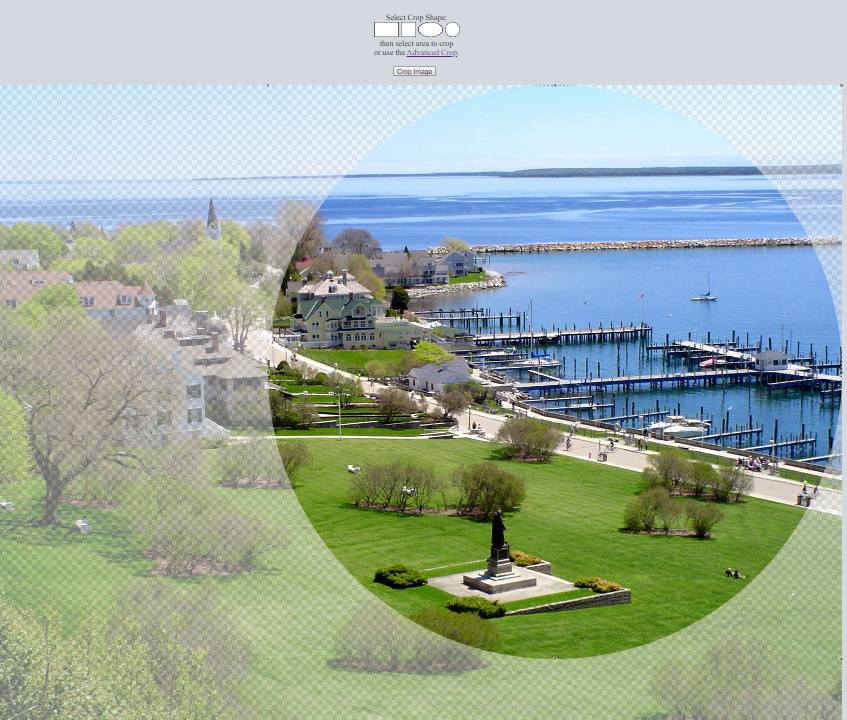
5. Check the dimensions using the File Menu, Image Size Info command. If the width isn't close to 400 pixels, click Scale Image, change the width to 400 (let the height automatically adjust on it's own). Then, click Apply Scaling to make the adjustment.

NOTE: Because of the shape we selected, the file has been converted to a png file (it is no longer a jpg file). PNG files allow for transparent backgrounds which is what we want in this graphic. You cannot optimize png files by adjusting the quality (that is onlly something you can do for jpg files).
6. Use the File menu, Save Image command.
7. Click Save as PNG. Navigate to the Lesson3/media folder. Enter the filename marquettePark and click the Save button
Optimizing, converting to black and white and removing haze:
To see a video demonstration, watch: https://youtu.be/kHlXkcuPQN8
1. Go to https://www194.lunapic.com/editor/
2. Upload the marina.jpg image (Click the Upload command button, navigate to the Lesson3/media folder, select the graphic and click Open to upload)
3. Use the File menu, Image Size Info command. Take a look at the dimensions, file size and jpg quality. If the quality is less than 100%, click Change Quality. In the quality textbox, enter 100 and then click Apply.
4. Use the File menu, Image Size Info command. Click the Set File Size link. Enter 50KB for the size and click Resize File.
5. If your width dimension isn't 400 pixels, either click Resize dimensions or use the Edit menu, Scale Image command. Enter 400 for the width and click Apply Scaling or Scale Image (the height should remain in proportion).
6. To see the current size, use the File menu, Image Size Info command. To decrease the size, select Change JPG Quality and enter 95%, then click Apply. The new size should be approximately 52KB
7. Convert the image to black and white using the Filters menu, Black and White command.
8. Sharpen the photo using the Adjust menu, Dehaze command and then use the Adjust menu, Sharpen command.
9. Use the File menu, Save Image command.
10. Click Save as JPG. Change the filename to marinaOptimized and save the file into the Lesson3/media folder
Task #3 - Create a thumbnail in LunaPics
To see a video demonstration, watch https://youtu.be/hIW6bixT_fA
1. Download bridgeOptimized.jpg to the Lesson3/media folder
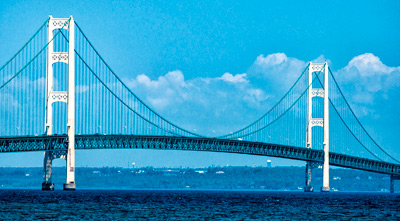
2. Go to https://www194.lunapic.com/editor/
3. Upload the bridgeOptimized.jpg image (Click the Upload command button, navigate to the Lesson3/media folder, select the graphic and click Open to upload)
4. Use the File menu, Image Size Info command. Click Change Quality. Enter 100 in the textbox and then click Apply.
5. Use the File menu, Image Size Info command. Click the Set File Size link. Enter 20KB for the size and then click Resize File.
6. For this image, we are going to change the height instead of the width (normally, a thumbnail has a width between 100-200px) The page we are going to display the thumbnail in, has several displayed in a row. To make that look good, we need them to have the same height.
If the height dimension isn't 150 pixels, either click Resize dimensions or use the Edit menu, Scale Image command. Enter 150 for the height and click Apply Scaling or Scale Image (the width should remain in proportion).
7. To see the current size, use the File menu, Image Size Info command. To decrease the size, select Change JPG Quality and enter 95%, then click Apply. The new size should be approximately 22KB
8. Use the File menu, Save Image command.
9. Click Save as JPG. Change the filename to bridge-thumbnail and save the file into the Lesson3/media folder
Task #4 - Adding images and links to an existing page
Part 1: Adding images:
To see a video demonstration, watch: https://youtu.be/lZx8YatlXNk
1. Download the following page to the CIT180/Lesson3 folder: mackinac-photos.html
2. Download the following photos to the media folder located inside the CIT180/Lesson3 folder: fort-thumbnail.jpg and GrandHotel-thumbnail.jpg

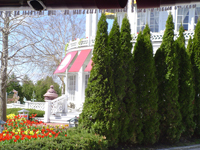
3. Open mackinac-photos.html for editing. Below <h3>Arch Rock</h3> use the <img> tag to insert the archRockOptimized image as shown below:
<h3>Arch Rock</h3>
<p><img src="media/archRockOptimized.jpg" style="width:400px;" alt="Arch Rock"/></p>
4. Below <h3>Marquette Park</h3> use the <img> tag to insert the marquettePark image as shown below:
<h3>Marquette Park</h3>
<p><img src="media/marquettePark.png" style="width:400px;" alt="Marquette Park"/></p>
5. Below the <h3>Mackinaw City Marina</h3> use the <img> tag to insert the marinaOptimized.jpg image similar to how you added images above in steps 3 and 4. Make sure you add alternate text indicating the image is of Mackinaw City Marina
IMPORTANT: When you view your page LIVE upper and lowercase matter. If your media folder is named Media with a capital M, then you need to use the capital M in your code. Likewise, if it is named with a lowercase m as the examples above, that is what you need to use in your code. The upper and lowercase letters in the src attribute must match 100% or the graphics will not display "live"
Part 2: Adding links:
1. Insert the following relative link around the thumbnail image as shown below (link text is in red and boldfaced):
<a href="media/bridgeOptimized.jpg"><img alt="Mackinac Bridge" src="media/bridge-thumbnail.jpg" style="height:150px;" /></a>
2. Insert the following absolute links around the thumbnail images shown below (link text is in red and boldfaced):
<a
href="http://lisabalbach.com/CIT180/Lesson3/media/fort.jpg"><img alt="Fort Mackinac" src="media/fort-thumbnail.jpg" style="height:150px;" /></a>
<a
href="http://lisabalbach.com/CIT180/Lesson3/media/GrandHotel.jpg"><img alt="Grand Hotel"
src="media/GrandHotel-thumbnail.jpg" style="height:150px;" /></a>
3. Save your changes and test the page offline to make sure the images all display and the links work. If there is a
link that doesn't work, you will need to correct the problem and save your
changes (typically links don't work due to typos).
PLEASE REMEMBER that you must also check your pages after you transfer them to the web. One of the main problems students have with this assignment is the upper and lowercase letters in the link href attribute and the img src attribute don't match the way you have named the files and folders. The images and links will work offline, but they will NOT work when they are live (offline isn't picky about upper and lowercase, online is)
Task #5 - Inserting images and links into an existing page
To see a video demonstration, watch https://youtu.be/2vGp58HEcK4
1. Download yosemite.html to your CIT180/Lesson3 folder. Download yosemite-el-capitan.jpg and yosemite-tunnel-view.jpg to the CIT180/Lesson3/media folder
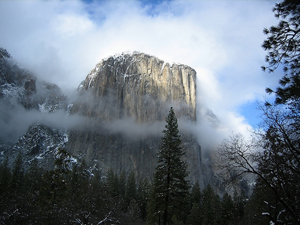
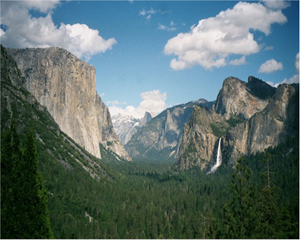
2. Open yosemite.html for editing.
a. Add the following tag to paragraph 1 after the <p> tag:
<img src = "media/yosemite-el-capitan.jpg" alt="El Capitan" title="El Capitan, Yosemite" style="width:300px; height:225px" />
b. Use the File Explorer to find the Lesson3/media folder and open it. Find the yosemite-tunnel-view.jpg photo and right click on it. Look at the Details tab and take note of the dimensions (width is displayed first and then height).
Add the following tag to paragraph 2 after the <p> tag:
<img src = "media/yosemite-tunnel-view.jpg" alt="Tunnel View" title="Tunnel View, Yosemite" style="width:# pixels you wrote down; height:#pixels you wrote down;" />
c. Save your changes and view the page offline.
3. You may notice that the images don't display very well with text. Next week we will be learning how to style images using CSS. For now, I have added some CSS to the top of your html file (you probably noticed it when you were inserting the codes earlier). To fix the problem with the images:
a. Add id="leftPic" to the first image tag
<img src = "media/yosemite-el-capitan.jpg" alt="El Capitan" title="El Capitan, Yosemite" style="width:300px; height:225px" id="leftPic"/>
The styling will make the text flow around the picture and it will add some spaces to the right and bottom of the picture so the text doesn't butt right up against the edge of the image.
b. Add id="rightPic" to the second image tag. Place it at the end of the tag just like you did for the first image, the only difference is the id is set to rightPic instead of leftPic (this will cause the text to flow around the left of the picture and it will put spacing above the picture and to the left of the picture).
c. Save your changes and view the page offline in the web browser - you should notice the text flows around the images similar to the example below:

4. At the bottom of the page, above the </body> tag, insert the following paragraph and bulleted list:
<footer>
	<p>For more information on Yosemite, visit:</p>
	<ul>
		<li><a href="https://www.nps.gov/yose/index.htm">Yosemite National Park</a></li>
		<li><a href="http://anseladams.com/ansel-adams-yosemite/">Ansel Adams Images of Yosemite</a></li>
	</ul>
</footer>
</body>
</html>
Task #6 - Add internal links to a page
We will be adding the ID attribute to specify the destination for our links. After all the ID's are in place, we will add the actual hyperlinks to them.
Part 1: Adding ID's
To see a video demonstration of part 1 and part 2, watch, https://youtu.be/LczSKmkRSMo
1. Download top-rock.html into the CIT180/Lesson3 folder.
2. Download rock-n-roll.jpg to the CIT180/Lesson3/media folder

3 . Open the top-rock.html file for editing.
4. Scroll down and find the tag shown below.
<h1>1950's</h1>
Then, add id="1950" to the tag
<h1 id="1950">1950's</h1>
5. Scroll down, find the tag shown below
<h1>1960's</h1>
Then, add id="1960" to the tag
<h1 id="1960">1960's</h1>
6. Scroll down, find the 1970's heading and add id="1970" to the tag
<h1 id="1970">1970's</h1>
7. Scroll down, find the 1980's heading and add id = "1980" to the tag
<h1 id="1980">1980's</h1>
8. Scroll down, find the 1990's heading and add id="1990" to the tag
<h1 id="1990">1990's</h1>
9. Scroll down, find the 2000's heading and add id="2000" to the tag
<h1 id="2000">2000's</h1>
10. At the very top of the document in the h1 tag for the title, add id="top" to the tag
<h1 id="top">Top Rock Songs</h1>
11. Save your changes.
Part 2: Adding Internal Links
- Add the internal links to the top of the page within the <header> section as shown below (links are displayed in red and boldfaced)
<header>
<h1>Top Rock Songs<img alt="rock and roll graphic" src="media/rock-n-roll.jpg" style="width: 400px; height: 301px; float: right"></h1>
<h2><a href="#1950">1950's </a></h2>
<h2><a href="#1960">1960's </a></h2>
<h2><a href="#1970">11970's </a></h2>
<h2><a href="#1980">1980's </a></h2>
<h2><a href="#1990">1990's </a></h2>
<h2><a href="#2000">2000's</a></h2>
<h2> <em><small>Taken from digital dream door 7/29/2016</small></em></h2>
</header>
NOTE: By default, links will display in blue, visited links in purple, active links in red. You will be learning how to adjust the colors using CSS next week
- Modify all occurences of [Back to Top] by adding a
link around the text (see below)
<p><a href="#top">[Back to Top]</a></p>
- Save your changes and view the file offline in a web browser.
Click on the different links to make sure they work.
If the links don't work, minimize the web browser and go back into the editor to fix them. Double check to make sure you remembered to add both double quotes " around the text. Also, make sure you inserted # in front of the name when you used the href attribute.
- Save your changes
- Swap back to the browser and click on Refresh or Reload to update the display.
- Repeat steps 3-5 until the links all work correctly.
Summary of What to Turn in and Grading Rubric
1. Transfer everything that is in the CIT180/Lesson3 folder to the server (that includes the media folder and all it's contents). Make sure you view all your pages "live" on the web to ensure that the graphics all display and that the links all work correctly.
To see a video demonstration, watch: https://youtu.be/HP86_2M15c4
2. Here's a summary of what you should have completed:
a. Mackinac-photos.html (10 points)
- created archRockOptimized.jpg with a size close to 50KB and width of 400px (1 point)
- created marquettePark.png using the circle crop tool and adjusted the width to 400px (1 point)
- created marinaOptimized.jpg with a size close to 50KB, a width of 400px and converted the graphic to black and white and dehazed it to sharpen the image. (2.5 points)
- created the bridge-thumbnail with a size close to 20KB and a height of 150px.(1 point)
- added the <img> tag correctly for the three photos that are supposed to display on the page (included the alternate text and style that specified the 400px width) (1.5 points)
- created a relative link to the Mackinac Bridge photo using the bridge thumbnail graphic (1 point)
- created an absolute link to the Grand Hotel photo using the grand hotel thumbnail graphic (1 point)
- created an absolute link to the Fort Mackinac photo using the fort thumbnail graphic (1 point)
b. Yosemite.html (4 points)
- graphics were added as directed and id's for formatting were added to <img> tags (2 points)
- the <footer> section was added to the bottom of the page with absolute links to the Yosemite Park website and Ansel Adam's photo gallery (2 points)
c. top-rock.html (6 points)
- id's were set up properly (3 points)
- internal links were set up correctly (3 points)
Make sure you view your pages "live" online. Do not only view them offline because you will not catch errors that deal with upper and lowercase letters.
Correct any issues or problems and transfer the corrections. IMPORTANT: If you are using Chrome and you reload your page and you do NOT see the changes, press CTL + SHIFT + DELETE and clear the files and images from the cache (when this happens it is pulling your old page from the cache on your hard drive instead of pulling the new content from the server)
3. If you need help, send me an email message with a link to your web page and I will look at it and get back to you.