By the end of this assignment, you will be able to:
Animate 2D and 3D elements using CSS 3 transformations, transitions and animation.
Add 2D and 3D elements, transformations, transitions and animation to existing pages.
You will be adding animation to the flexbox model page you developed in lesson 6 and the form you developed in lesson 8.
To see a video showing you how to apply animation to the flexboxModel page (copied from lesson 6), view: https://youtu.be/V_O1cAGqFtg
To see a video showing you how to apply animation to myForm (copied from lesson 8), view: https://youtu.be/RGYWQfPnTDs
1. Copy the Lesson6/flexboxModel.html page into the Lesson9 folder. Rename the file and call it flexboxModelWithAnimation.html Make sure you copy any images you used from the Lesson6/media folder into the Lesson9/media folder. You will also need to copy Lesson6/css/flexboxModel.css and paste that into Lesson9/css (the css folder does NOT exist, so you will need to create the folder and open the folder before you can paste the file)
2. Add animation to make the boxes rock when you point at them. To accomplish this, you will need to edit the CSS and add @keyframes with transform:rotate. You will also need to add section:hover to play the animation. To see an example, view: flexboxModelWithAnimation.html
3. Copy the Lesson8/myForm.html page into the Lesson9 folder. Rename the file and call it myFormAnimated.html Make sure you copy any images you used from the Lesson8/media folder into the Lesson9/media folder.
4. Animate the form title by inserting code into your h1 and adding the @keyframe rule (see example below).
h1{
position:relative;
font-family: 'Nixie One', cursive;
margin-top:10px;
margin-bottom:10px;
font-size:2em;
color:white;
font-weight:900;
text-shadow:1px 1px black;
animation:mymove 10s;
animation-fill-mode:forwards;
}
@keyframes mymove {
from {left: -30%;}
to {left: 20%;}
}
NOTE: You may need to adjust the left setting depending upon the alignment of your h1 text. If you have the text centered, then you should set left to 0%
Explanation: The position:relative css will look at the text in relation to it's position on the page. The text will begin animation from -30% to the left which mean the text will start partially of the screen. It will move towards the right until it reaches 20%. The animation will move forward at a rate of 10 seconds.
5. Animate the paragraphs in the form so they appear to slide across the browser window by modifying the p selector in the css and adding the following keyframes:
p {
animation-duration: 3s;
animation-name: slidein;
}
@keyframes slidein {
from {
margin-left:200%;
width: 300%;
}
to {
margin-left: 0%;
width:
100%;
}
}
NOTE: If your p selector has css in it, you need to add the animation-duration and animation name to the bottom (don't remove your existing styles, just add to them).
Explanation: the text in paragraphs will animate from the right side of the screen to the left side. A left margin setting of 200% moves the text to the right-hand side of the screen. It will animation to a margin-left setting of 0% which means the text will animation from the right to the left. The width will also animate. It will go from 300% to 100% so it will become more narrow.
6. Animate the submit and reset buttons so they grow larger and rotate in a circle when you point at them. To do that, add the following code to the bottom of the css for the input button and create an input button hover class.
Code that should go at the bottom of the button css is:
transition: width 1s, height 1s, transform 1s;
transition-timing-function:ease-in;
You will need to create hover styling for the input
button. Code that should be entered into the input button hover styling
is:
width: 300px;
height: 90px;
color:black;
transform:
rotate(360deg);
NOTE: You can use a different width and height
than the example, you just need to make sure the buttons get bigger and
rotate when you
point at them
I've included a full example below with the new codes highlighted in yellow; however, your code for the button may be called something different than mine and your fonts, font-styles etc will probably also be different. For example, I created .inputButton for the submit and reset formatting. You may be calling it something different or you may have used an ID instead of a class (which is OK). You will need to find where you are styling the buttons and add the code highlighted below to your css Then, you will need to take the classname and create the hover styling similar to the example below:
.inputButton{
font-size:14pt;
width:100px;
height:30px;
font-size:12pt;
background-color: green;
color:white;
font-family: 'Nixie One', cursive;
font-weight:900;
margin-top:50px;
box-shadow:2px 2px 2px black;
text-align:center;
transition:
width 1s, height 1s, transform 1s;
transition-timing-function:ease-in;
}
.inputButton:hover{
width: 300px;
height: 90px;
color:black;
transform:
rotate(360deg);
}
NOTE: You may need to make adjustments to the .inputButton hover width and that is OK
Here's a link to the full blown example (right click and select View Source to see all the css and html): myFormAnimated.html
Here's a link to another example where the .inputButton:hover width was modified and the left setting for the mymove animation was modified: techSurveyAnimated.html
If you need help with this, please let me know :)
7. Save your changes and view the page offline in the browser.
To see a video demonstration explaining the code in the file, view: https://youtu.be/vC9bA94BI3c
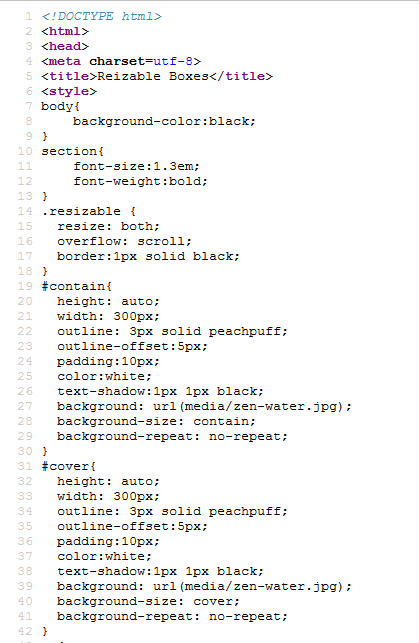
1. Download resizeable-boxes.html and save it into your Lesson9 folder. (NOTE: The file uses the zen-water.jpg image that you should already have in your media folder).
2. We will be using 2 new UI commands: resize and outline-offset. We will also illustrate the diffference between contain and cover for background images.
To do this, modify the css code as illustrated below:
a) In the #contain ID, insert
background-size:contain;
b) In the #cover ID, insert
background-size:cover;
c) Add the .resizable class to the css
.resizable {
   resize: both;
   overflow: scroll;
   border:1px solid black;
}
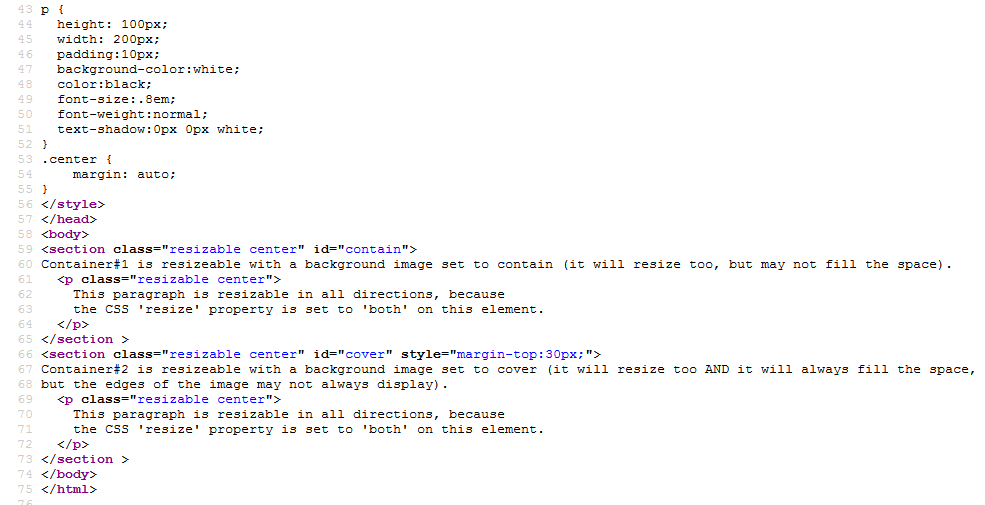
d) Modify the HTML to include the resizeable class
<section class="resizable center" id="contain">
     Container#1 is resizeable with a background image set to contain (it will resize too, but may not fill the space).
     <p class="resizable center">
        This paragraph is resizable in all directions, because
        the CSS 'resize' property is set to 'both' on this element.
     </p>
</section >
<section class="resizable center" id="cover" style="margin-top:30px;">
     Container#2 is resizeable with a background image set to cover (it will resize too AND it will always fill the space,
     but the edges of the image may not always display).
     <p class="resizable center">
        This paragraph is resizable in all directions, because
        the CSS 'resize' property is set to 'both' on this element.
     </p>
</section >
You completed code should look like the example shown below:
3. Save all your changes and test the page offline. A few things you should look for:
a) The paragraph box should resize
b) The background image with the background-size set to cover fills the background and a portion of the image isn't visible; whereas, the background-size set to contain doesn't fill the container, but you can see the entire background. Both images resize when you resize the container they are displayed in.
4. Correct any errors and save all your changes.
1. Add an animation keyframe or transition effect to your assignment page.
2. You can animate whatever you want, such as the title, subtitles,links, sections etc. You are only required to animate one thing, but if you want to animate more, that is OK!
3. Save all your changes and test it offline.
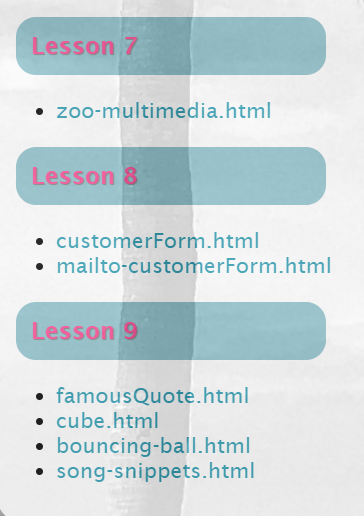
1. Update the textbook section of the assignment page by adding a Lesson 9 heading and links:
2. Update the lab section of the assignment page by adding the Lesson 9 heading and links:

3. Make sure the links work and then email me to let me know your assignment is ready for correcting :)
| 1. flexboxModelWithAnimation.html | 10 points |
| 2. myFormAnimated.html | 10 points |
| 3. resizable-boxes.html | 7 points |
| 4. assignment page has animation keyframes or transitions applied | 5 points |
| 5. assignments page updated with new links | 3 points |
| Total | 35 points |