CIT190 - JavaScript Programming
Objective: Create a page you will be linking your assignments into and transfer the page to your website
Minimum Requirements include:
1. Create a CIT190 folder.
2. Open the folder and create a media folder and a css folder
3. Create an HTML 5 compliant page - you can copy/paste the skeleton code below into VSCode:
<!DOCTYPE html>
<html>
<head>
<meta charset=utf-8>
<title>YourFIrstName YourLastName's Assignment Summary Page</title>
<link href="css/assignments.css" rel="stylesheet">
</head>
<body>
<article>
<header>
<hr />
<h1>CIT190 JavaScript Assignments</h1>
<hr />
</header>
<section>
<nav>
<ul><h2>Assignments</h2>
<li><a href="#">Week 1</a>
<ul>
<!-- dummy link displays current page -->
<li><a href="#">assignment page</a></li>
</ul>
</li>
</ul>
</nav>
</section>
<footer>
<p style="text-align:right;"> © YourFIrstName YourLastName 2018-2019</p>
</footer>
</article>
</body>
</html>
4. Name the page assignments.html and place the page inside the CIT190 folder.
5. Replace YourFirstName and YourLastName in the title and footer with your actual first name and last name.
6. Create the external css file and name it assignments.css Place the file into the CIT190/css folder.
7. Find a background image for your page. You can use https://pixabay.com to get a royalty free image or you can get free vector-based background at: https://www.freepptbackgrounds.net/
To use the free ppt background site:
a) Click the category menu and select an image category that interests you
or
Click the color menu and select a color range you like.
b) After making your menu selection, scroll down and look at the patterns.
c) Find a pattern you like, then click on it and see variations below the pattern. A variation that has white on the left side will work for the assignment page.
d) Left click the thumbnail to get a larger image. You will notice the mouse is a magnifying glass - click it to get an even larger image.
e) Next, right click the image, select Save Target As or Save Image As
f) Navigate to the CIT190/media folder NOTE: If you don't have a media folder inside CIT190, create one now by clicking the New Folder command and name the folder media
g) Make sure the CIT190/media folder is open. You should change the file name to make it easier to add to your page. In the Filename box, enter background and then click on Save
8. Pick a color scheme and colors for your page
There are many resources for this listed in the Design Sites and Information section within the Coding Resources block in Canvas.
If you want to use colors from your background image to create the color scheme, do the following:
a) Go to https://www168.lunapic.com/editor/
b) Use the Browse button, find your image and upload it. Then, select the File menu, Color Palette command. You should see the color palette generator with colors from the image listed below it. Save the page to your CIT190 folder for future reference.
9. Your page should be responsive and mobile friendly. I've included a skeleton of the css you need to use below (it includes flexbox). You can copy/paste the code into your assignments.css page. You will notice there are some settings filled in - these are recommended settings so your page will display correctly. You will need to fill in fonts, colors, widths etc. There are also comments indicating options or things you need to remember when adjusting the css.
Suggested CSS for the assignments.css page includes:
body {
font-family:
/* use
em for size or another relative measurement */
font-size:
background-image:
/* size should be should be cover or
contain */
background-size:
background-repeat:no-repeat;
}
footer, header{
background-color:
/* opacity is optional - if you have a
background photo, it will allow the photo to show through the color */
opacity:
width:
}
article{
/* use
the settings shown below */
display: flex;
flex-direction:column;
height:500px;
flex-wrap:wrap;
justify-content:space-between;
}
section{
flex:1;
background-color:
/* use % for padding, height and width */
padding:
min-width:
max-width:
min-height:
/* opacity is optional - if you have a background photo, it will allow the photo
to show through the color */
opacity:
}
h1{
font-family:
/* use em for size or another relative
measurement */
font-size:
color:
text-shadow:
text-align:
}
h2{
font-family:
color:
/* use em for
size or another relative measurement */
font-size:
text-shadow:
/* use % for width */
width:
background-color:
/* can use
pixels for padding */
padding:
/* opacity
is optional - if you have a background photo, it will allow the photo to show
through the color */
opacity:
/*
border-radius should be pixels */
border-radius:
}
nav {
margin:0px;
width:100%;
height:auto;
}
nav ul {
background:
/* box-shadow settings can be whatever you
want */
box-shadow: 6px 6px 6px black;
padding: 10px;
border-radius: 10px;
list-style: none;
position: relative;
color:
/* font-weight can be whatever you want */
font-weight:900;
}
nav ul li {
display:inline-table;
margin:10px;
padding:5px;
color:
}
nav ul li:hover {
color:
/* font-size should be a relative measurement
*/
font-size:
}
nav ul li a {
display: block;
/* the padding can be in pixels */
padding:
color:
text-shadow:
text-decoration: none;
}
nav ul li:hover a {
color:
text-decoration: none;
}
nav ul li:hover > ul {
display:flex;
flex-direction:column;
}
nav ul ul {
display:
none;
background:
/* the border
color can be whatever you want */
border:2px solid black;
border-radius: 0px;
padding: 0px;
position: absolute;
/* font-size should be a relative
measurement */
font-size:
z-index:10;
}
nav ul ul li
{
display:block;
/* you can
adjust the border top and bottom colors to whatever you want */
border-top: 1px solid black;
border-bottom: 1px solid
black;
position: relative;
text-align:
background:
}
nav ul ul li a {
padding: 15px;
color:
}
nav ul ul li a:hover {
background:
color:
}
NOTE: If you want to style your page a little differently, that is OK
10. Once you are done with your assignments.html page and the assignments.css page, view the page offline in at least 2 web browsers. Correct any errors or problems.
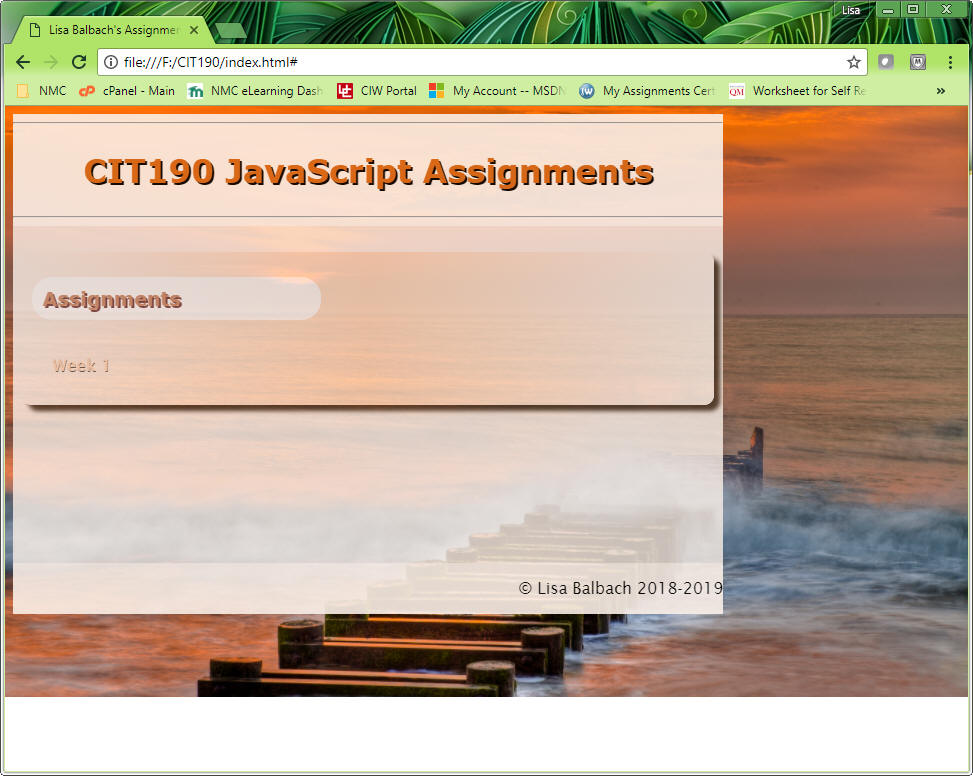
Your completed page should look similar to the one below:
At this point, you should have the following folders/files in your CIT190 folder
1. Launch FileZilla
2. Make sure you are connected to the Internet. To connect to the web server, enter the following information:
Host: ftp.lisabalbach.com
Username: NMCusername@lisabalbach.com
Password: use the password your instructor emailed to you
Port: 21
Example:

3. After filling in the information, click the Quickconnect button
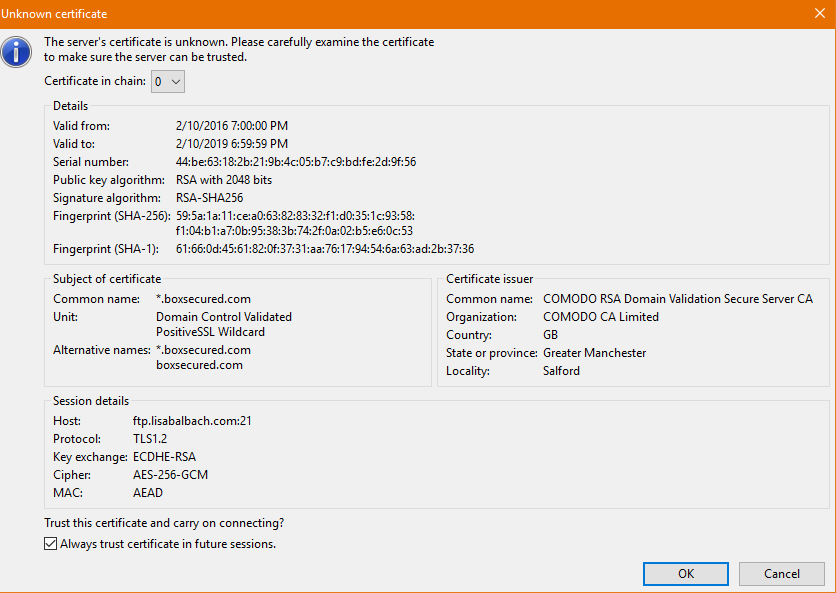
4. When you see the unknown certificate message, put a check in the box next to Always trust certifications in future sessions and click OK to bypass the messge.
5. Once you are connected, you will see a window similar to the example below. The frames on the left, labeled Local Site represent your computer. The frames on the right labeled Remote Site, represent what you have on the web server.
Example showing connection information and content

6. To transfer files, you need to find the files on your system. To do that, you need to open the drives and folders to navigate to your CIT190 folder.
7. You can transfer files and folders. To transfer the entire CIT190 folder, make sure it is displayed in the pane on the left and then left drag it to the pane on the right
8. Once you see the folder on the right-hand side, you can double click on the folder to open it and ensure all the files are there.
9. To view the files online, enter the following: lisabalbach.com/your NMC username/CIT190/
NOTE: The address is case sensitive, so if you created the CIT190 folder in all lowercase letters, that is how you need to enter it into the address bar.
To see a video showing you how to replace a file, watch: https://youtu.be/nr4czgpL_n0 NOTE: The video shows you what to do if Chrome displays the old version of your page instead of the new version
IF YOU CHANGE A FILE, you will need to retransfer the file. Steps to transfer a file you have changed include:
1. Launch FileZilla
2. Make sure you are connected to the Internet and then connect to the web server using the procedure described above
3. Navigate to the folder on your system where the page is stored.
4. Display the page in the pane on the left-hand side
5. Display the location you want to transfer to in the pane on the right hand side (this means you need to open folder(s) the page needs to be saved into) WARNING: MANY STUDENTS HAVE PROBLEMS doing this correctly because they forget to open the correct folder on the web server, so their pages aren't transferred to the correct location. Then, they try to display the modified page and it looks like their changes didn't take, when in reality they are checking the old page rather than the new one.
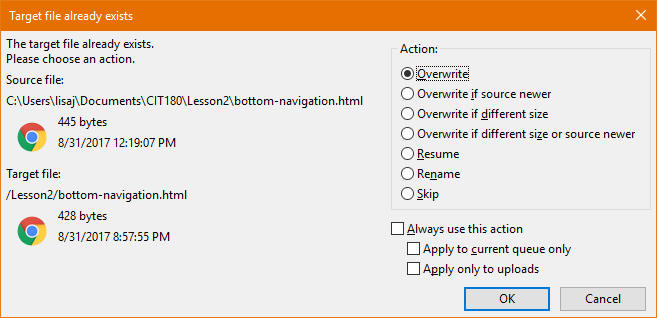
6. To transfer your modified page, left drag the file from your system on the left to the right hand side. You will see a prompt from FileZilla asking you for permission to replace the file on the web server. By default the Overwrite option is selected and that is the option you want. I normally check the box next to Always use this action, so I don't have to see the dialog box every time I make changes and transfer a page. Unfortunately, you will always see this window the first time you make a change, but if you check the box, it won't display again during your ftp session.
To see a video showing how to execute commands on the web server using FileZilla, watch: https://youtu.be/eyfANQgAh1k
To remove a file from the server, click the file and press the delete key.
To create a folder on the server, right click in the bottom right pane (where the files are listed) and select Create Directory. Enter a name for the folder and click OK
To rename a file (or folder) right click and select rename from the menu. Type the new name and press enter.
To transfer files from the server to your computer, left drag from the server side (right side) to your computer on the left-side
To move files or folders within the server, left drag them.
IMPORTANT: If you have any questions or if you run into problems, let me know BEFORE the assignment is due! It is helpful, if you transfer your page and then send me an email so I can look at it and help you resolve the issue.
| Created CIT190, css and media folders | 1 point |
| Created assignments.html with all requirements | 5 points |
| Found a background image and selected a color scheme | 3 points |
| Created assignments.css with all requirements | 8 points |
| Transferred all files/folders to the web | 3 points |
| Total | 20 points |