The chapter covers how to use SQL Server Management Studio (SSMS). By the end of the chapter, you will be able to:
If you have not downloaded and installed SQL Server, SQL Server Management Studio (SSMS), the textbook authors database files, Northwind database or World Wide Importers database, please do so now: ../Startup/software.html
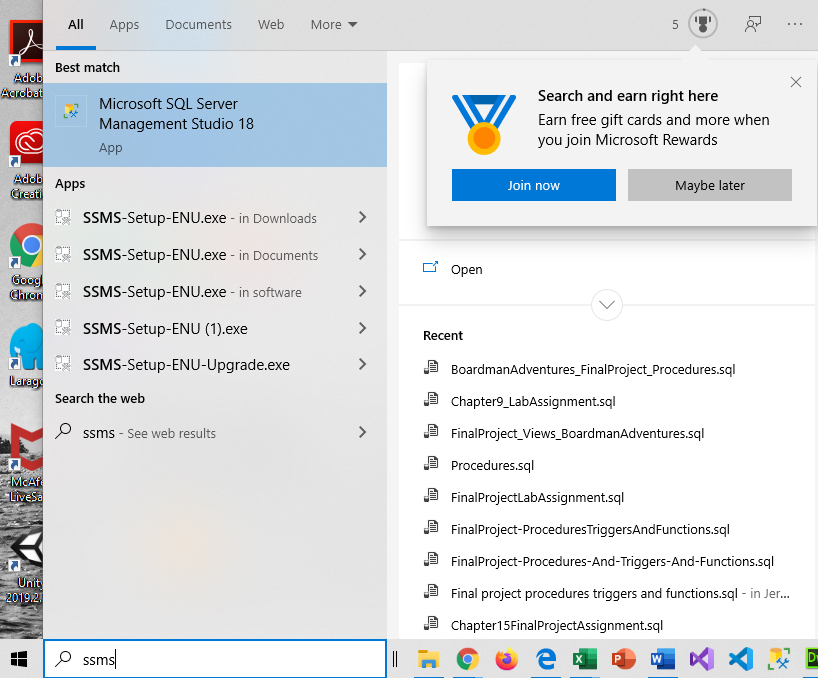
In the Windows Search box, type SSMS or use the menu to find SSMS (If you use the menu, it should be in the Microsoft SQL Server Tools folder).
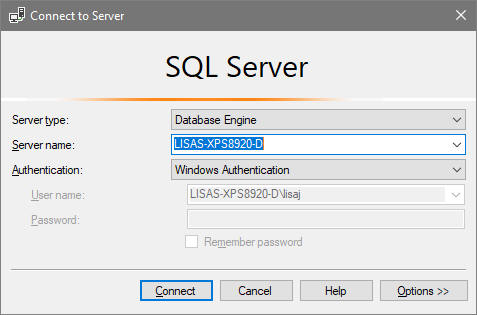
After launching the software, you will see a Connect to Server window similar to the one below:
You should use Windows Authentication to connect (that will use your windows login information). Later in the course, you will learn more about authenticated SQL Server logins. To enter SSMS, just click on the Connect button.
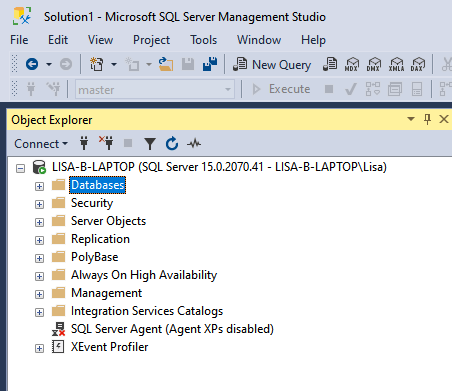
After connecting to SQL Server, you should see the management studio window with object explorer pane or panel open. We will spend most of our time working with Database Objects.
IMPORTANT: To learn how to use commands, you must have database files with tables in them. If you are using computers on-campus, you will notice the database files and tables have been preloaded into the program for us to use. At home, you will need to download the database files and load the database files/tables manually. The following video shows you how to download and install the textbook database files, the Northwinds database and the WorldWideImporters database: https://www.youtube.com/watch?v=3WE81xVttLI&feature=youtu.be For the publisher's database and Northwinds database, you will run a script that creates the database and tables. For WorldWideImporters you will be working with a backup database file. To add the database to your system, you will need to restore the database and the video walks you through the process.
When you enter the management studio, you should see the Object Explorer on the left-hand side. It appears as a panel containing folders. If you don’t see it, use the view menu and select Object Explorer to turn it on (you can also press F8)
Use the + to expand DB objects and the – to collapse
To hide the explorer, click the push pin (autohide button) at the top of the panel. You’ll see a tab display on the left side – click the tab to display the panel. To re-pin, just click the pushpin (it will display sideways when auto-hide is on)
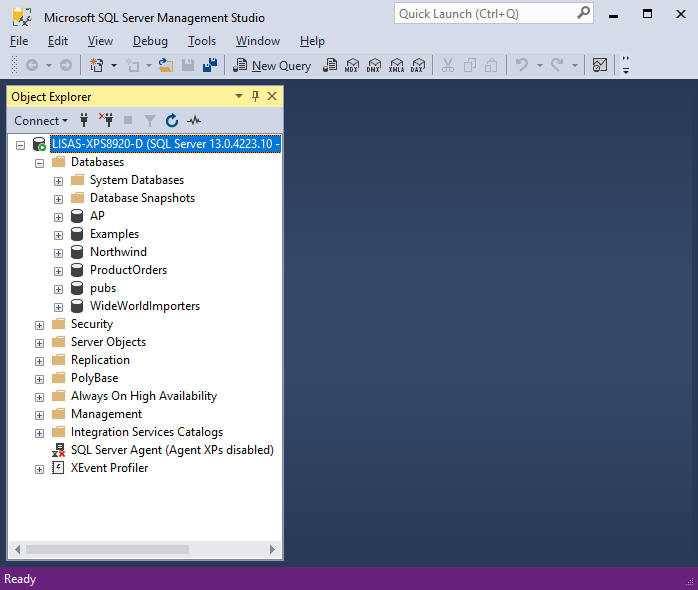
If you expand Databases, you will see the database objects that are attached to SSMS. Database objects can be removed (detached) when they are not in use. You can also attach a database if you want to use it.
To detach a database:
WARNING: Detaching is different from deleting. You should NOT delete a database unless you want to permanently remove it Detaching simply removes the database from displaying in SSMS (it does NOT delete the database itself)
To attach a database:
It is a good idea to backup database files. If the database is very active, backups can be done on a nightly basis. If the database becomes corrupt, you can restore the database from the backup. The only data you would lose is new data entered after the backup was taken.
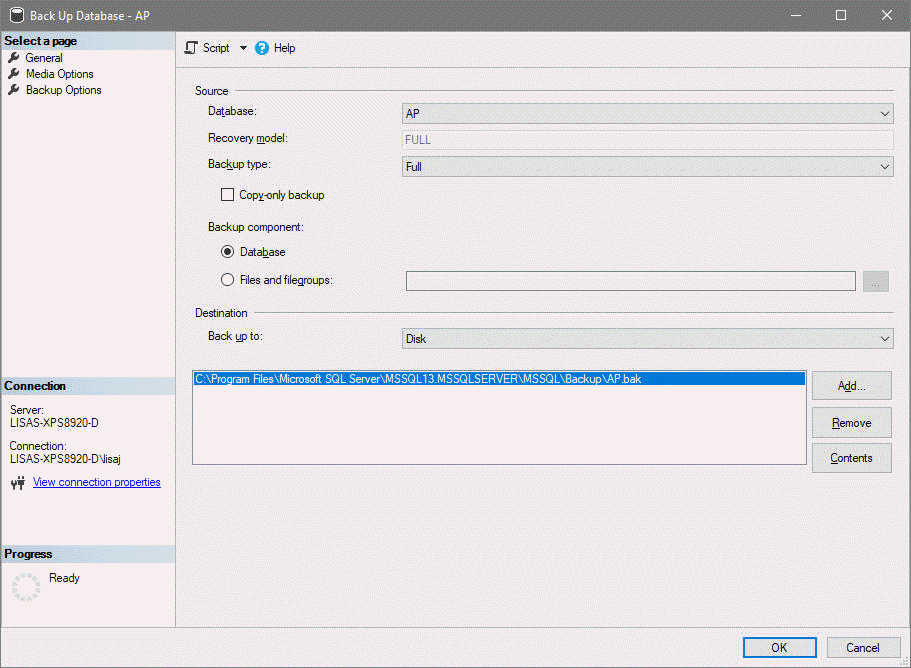
To backup a database:
a) Full - contains all the data in a specific database or set of file groups or files, and also enough log information to allow for recovering that data. It is the base of both differential backup and transaction log backup.
b) Differential - only records the data which has changedsince the last successful full database backup. This type of backup is faster and results in smaller files sizes.
c) Transaction Log - a serial record of all the transactions that have been performed against the database since the transaction log was last backed up. With transaction log backups, you can recover the database to a specific point in time (for example, prior to entering unwanted data), or to the point of failure.
Example:
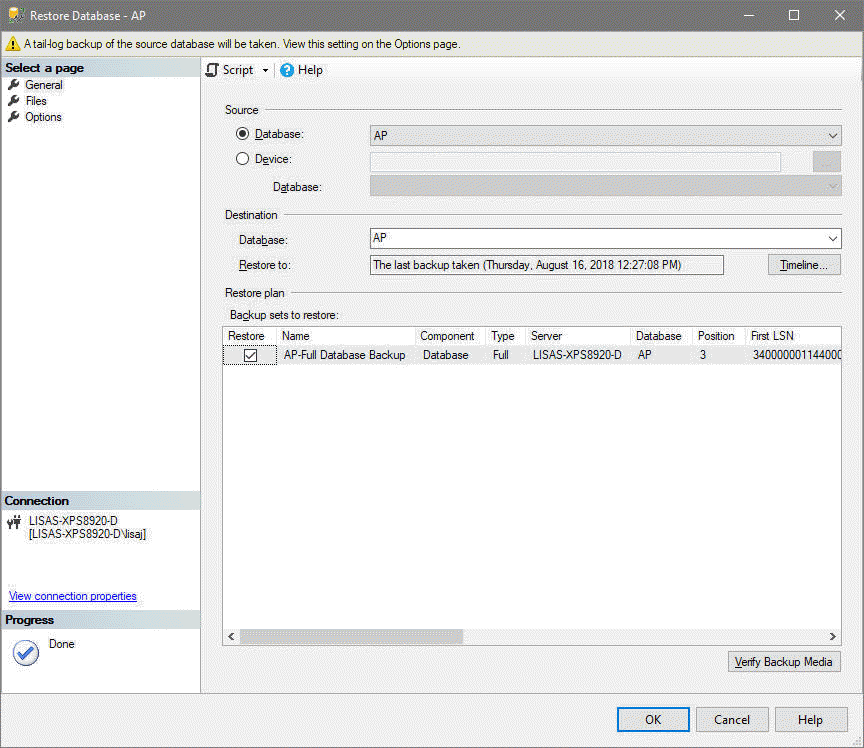
To restore a database:
If you have a system failure that resulted in a loss of data or if the database is missing, you can restore a database using it's backup file.
Example:
SQL Server versions change quite frequently. To ensure that an older database will be able to use new features, you can adjust the compatibility level.
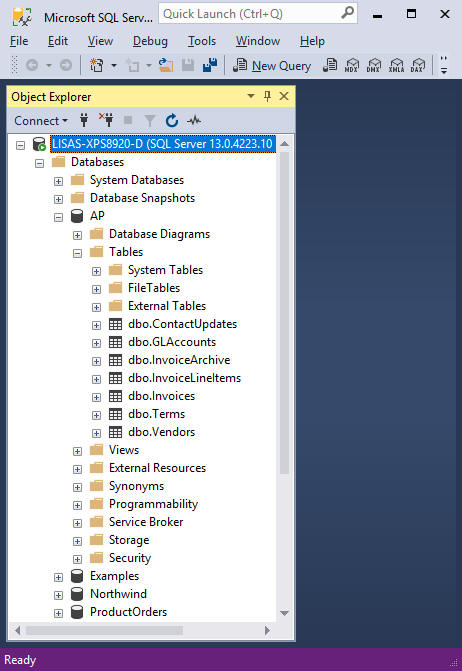
To see tables within a database, expand Databases folder by clicking the + sign. Find the database whose tables you want to view and expand the database by clicking the + sign.
You should see the database folders displayed. Find the Tables folder and expand it to see the tables within the database. You should see all table names prefixed with dbo. which stands for database object.
Example:
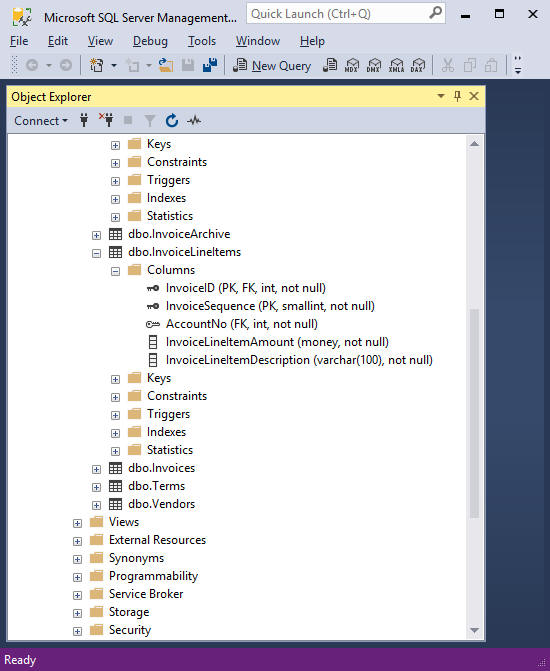
To see columns within a table, expand the table by clicking the + sign. This will display several table folders. Expanding the columns folder will display the column names along with the data types, sizes and constraints such as PK for primary key, FK for foreign key, or not null for columns that require data and cannot be blank.
In the example below, Primary keys are identified by PK and also by the black key symbol. Foreign keys are identified by a white key and FK. If a key, like InoviceID is both a primary key in this table and a foreign key in another, you will see both PK and FK listed as constraints. Keys are constraints because primary keys must be unique (you cannot enter a duplicate) and foreign keys connect tables so changes to the value in one table will force changes in the related table because they must be in synch.
You can rename a column in the object explorer pane by right clicking the column and selecting rename from the menu
If you notice a column is a foreign key, you can see which table it is connected to by expanding the Keys folder
Example:

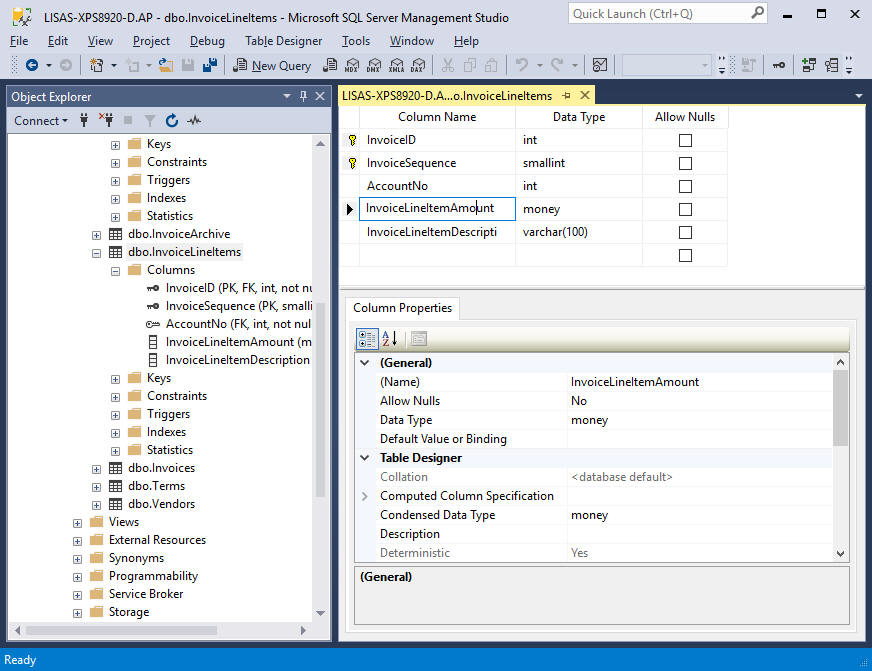
You can change the column name, data type and whether it allows null values or not by going into the table designer. To access the table designer, right click the table name and select Design from the menu.
You will see the table designer window display with the column names, data types and checkboxes to indicate whether or not nulls are allowed. At the bottom fo the window are additional properties you can change for the selected column.
Example:
To see actual data that was entered in a table:
a) Right click the table name
b) Choose Select
Top 1000 Rows from the menu. You will see a query
formatted and displayed at the top of the query editor AND you will see
the data in the results table at the bottom of the pane. The
messages tab will display errors, row counts and other information from
the system.
Example:
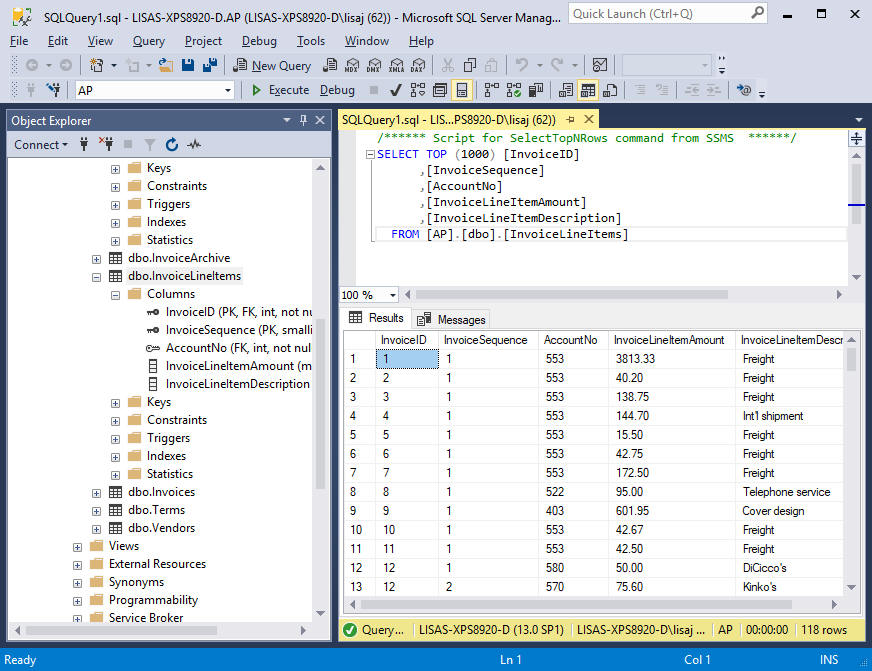
NOTE: The command used to view data does NOT let you make changes to the data.
If you want to change data in a table, you need to Right click the table name and use the Edit Top 200 Rows command. This will display the data in a format similar to a spreadsheet . You will be able to change data displayed by clicking the data and typing the new value.
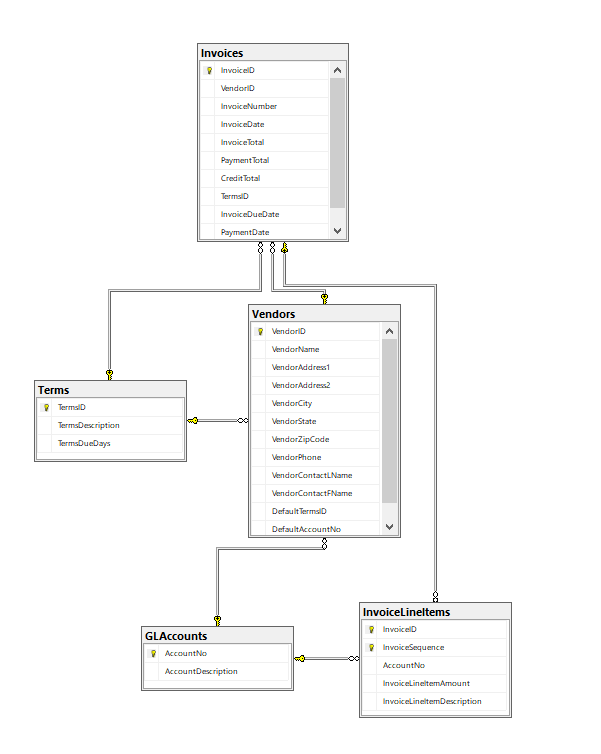
DB diagrams are extremely useful because they show all the columns in a table, indicate which key is the primary key AND they show how tables within a database are related. The Key in the connection indicates a 1 and the infinity symbol indicates many.
Example showing the relationship between several tables in the AP database object. You should note the connection lines between tables connect the primary key in a table to the foreign key in the related table (pointing at the line and pausing displays a tooltip that tells you how they are related):
To see more information on a column, click on the column and a properties pane will display to the right of the diagram. In the example below, properties for the InvoiceTotal column are displayed.
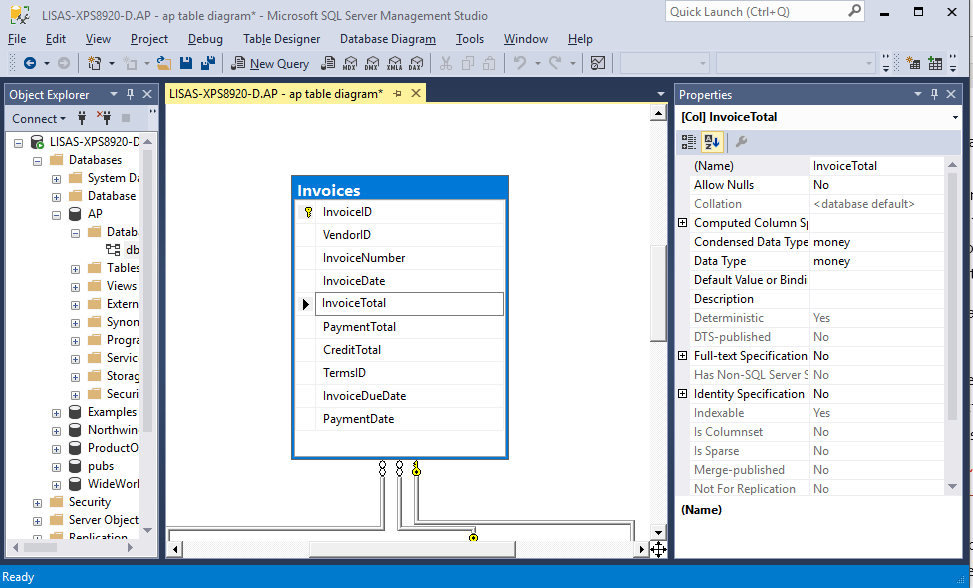
NOTE #1 You can reposition tables by left dragging the table title
and you can resize the table by dragging a border
NOTE #2 You can modify column
names, add columns remove columns etc from the diagram window, but that
should ONLY be done when you are creating a new DB that is under
development So, basically, you need to be careful that you don’t
accidentally modify column names, values etc when you are in this
window.
To view existing diagrams, click the plus sign next to the DB Diagram folder and double click the diagram. If the database doesn't have a diagram, you will probably see a message similar to the one shown below:
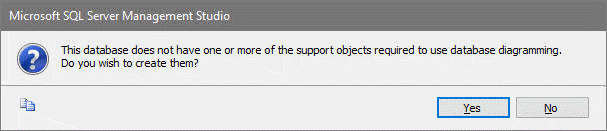
Select YES and a diagram should be generated using all tables within the selected database object.
If you don’t see a diagram and you don't get a prompt window, try Rirght clicking the DB Diagram folder and selecting Refresh.
To create a diagram, Right click the DB Diagram folder, select New Diagrams, choose all the tables you want to diagram, click ADD and click OK (the diagrams will be generated. When you close the diagram window, you can save the diagram and give it a name
You will be spending a great deal of time creating queries.
To create and save a new query:
• Click the New Query button
• Enter the query
into the window
• Save the query
• Execute the query using the
Execute button or by pressing F5
• Save the query by clicking
the save icon and giving the query a name. You will want to change
the location the query is saved to because by default, it will be saved
into a SQL Server folder that will be erased when you shut down the
computer. You will want to save ALL your queries to the Q drive.
If you are at home, the file will be saved under Documents/SQL Server
Management Studio which is OK, it is only a problem at school.
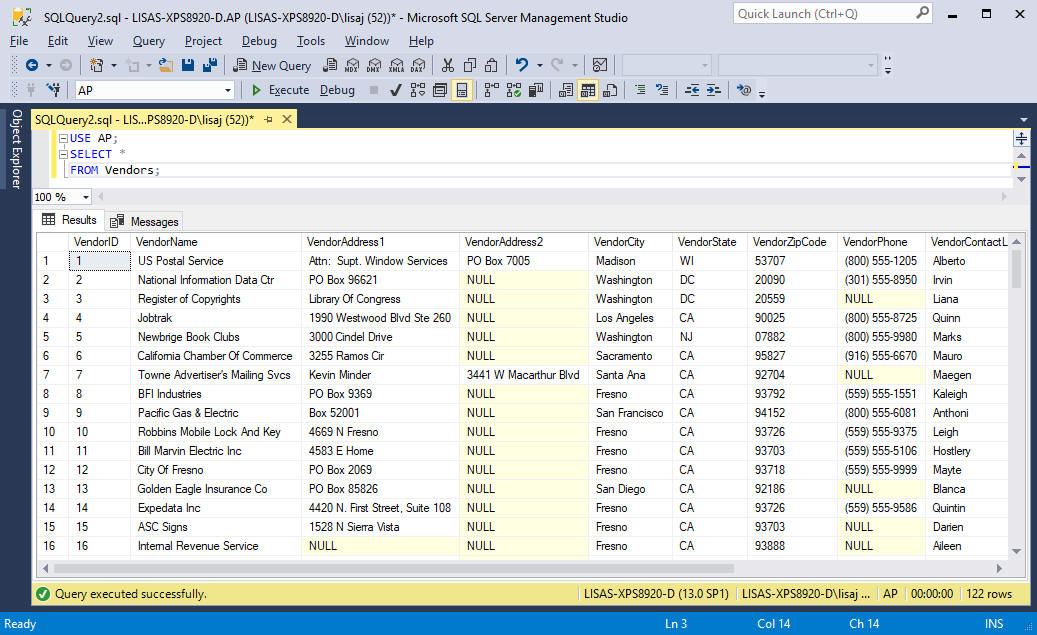
Example Select query showing all the data in the Vendors table. You will be learning a lot about select queries starting in chapter 3 and throughout the semester.
The MSDN website is a valuable resource
To find the website, do a search on: MSDN SQL Server documentation
You will see a link to SQL Server Documentation | Microsoft Docs (it will probably be the first link)
Select the link to view the documentation: You will see a download pdf link in the lower left hand corner -that will give you a pdf of the page with links to the various resources.
To find more information on specific commands, search for transact SQL command reference
Select the Microsoft Docs link. You should see Transact-SQL Reference(Database Engine) | Microsoft Docs
https://docs.microsoft.com/en-us/sql/t-sql/language-reference